Tuesday, November 22, 2011

metal work

 I don't know if you've ever been to Portland between the months of September and July but it kind of rains a lot here. And it rains for a long time too (as in about 6 or 7 months of rain plus 2 or 3 or 4 more months of un reliable weather). To combat cabin fever and to help myself not have a wet ass all the time I made some fenders.  I should say I made some fenders again. The last set of these got stolen, along with my bike in the early spring.  I'm still waiting to see my old bike go by so I can bulldog some one in the bike lane...Anyway, I had some copper left from the last time I made these.
Pretty simple to make.  I just had to draw a center line and wail on them for about 6  hours until they were roundish.  The first set took way longer.  The rear that I made last only actually took me about 2 hours start to finish. I'm starting to get the hang of stretching the material where I need to to get the curvature I need.
I just beat on the copper on a panel bag I made with some suede hide and some playground sand. They have a slightly dimpled look as I didn't feel like spending 12 more hours picking out all of the high and low spots to make them perfect.  I like the look, plus I'm hoping the indentations will help capture water and make them patina faster.
 And like always, no process photos, I'm always too busy making things to stop for documentation.

Sunday, November 13, 2011

Wow

It's been a while since I posted anything on here.  I wish I could say it was for a good reason, like a world tour or even some jail time but...I've just been busy with work, life making things and above all just plain lazy.  So to the one or three of you who actually look at this (probably no-one now given the length of time it's been since my last post) I'm almost sorry.  Without further fanfare here are a few things I've done lately.

I made a pair of collars for some dogs.  They are made of latigo using only rivets for attaching articles, no stitches to fray or break when the dogs are out doing dog things.  I was presented with a challenge when making these and that was that one of the pair of dogs is apparently Satan and if she can get a hold of her dog friends collar end she will tug and tug on it.  Thus tightening and strangling her friend.  So here owners wanted the collar end to be somehow tug proof.


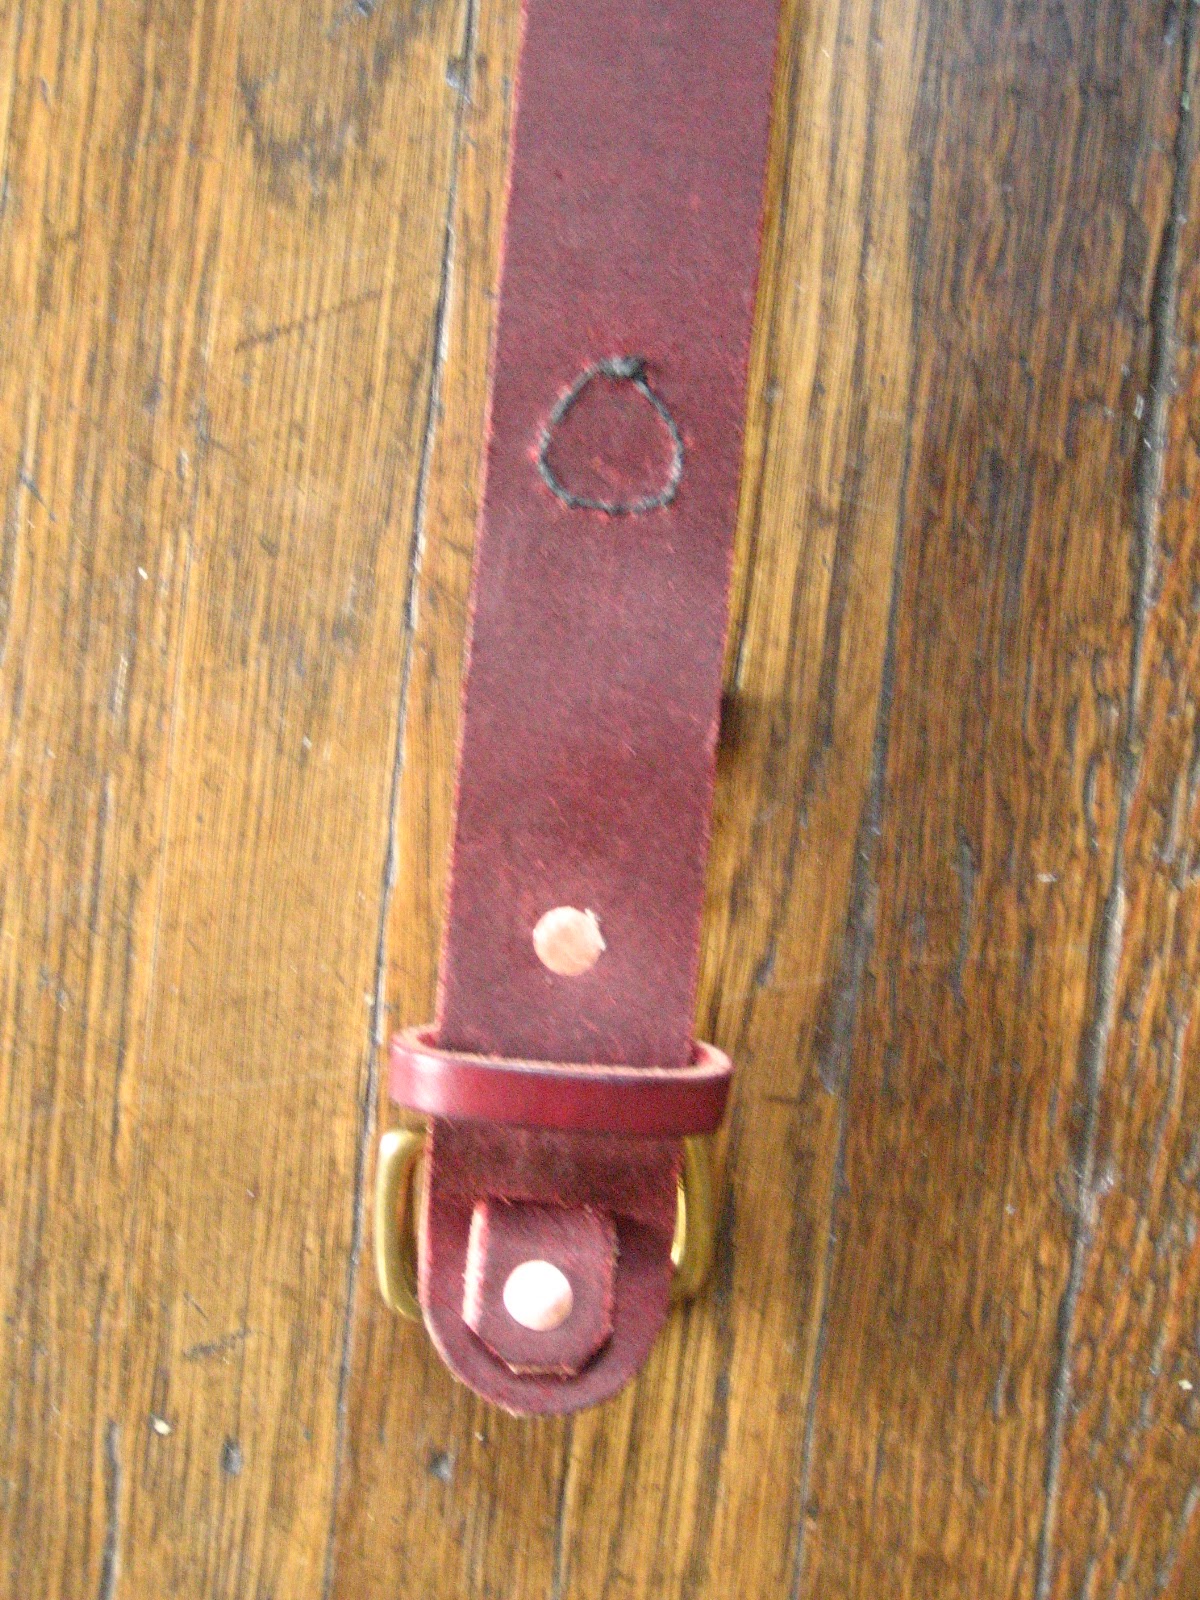
 After thinking on it for a little bit I made the end of the collar go back under the collar and lie against the dogs neck.  To keep it there I used a Sam Browne button.  Simple and safe.  And it's in line with the rest of the over and under interplay of the collar, which I like.


 Next (but actually before the collar) I made a tool for setting rivets.  I use a rivet that you hammer on to set.  I feel it's a more secure way to fasten rivets than the split rivets Tandy sells and it looks better as well.  The only problem is making them look nice and somewhat uniform through out a piece can be frustrating.  So I made this little gem out of some stainless steel bar.  I drilled one end out for setting the ring on the rivet shaft and the other end is domed for setting the actual rivet.  After that I milled off some of the sides so it wouldn't roll off my work station.


 Next is more of what you've seen before just some refinement in the process.
Key chains in a few colors

Card sleeve and front pocket card wallet with my mark on them

And here is a ladies belt that I've made a few of.  It can be worn at the waist or hips and is secured with a piece of ribbon, color of your choosing.  This makes it work with just about any outfit.
 That's it for now.  Since the monsoon season has returned I promise I'll post more now.
Also, if you like any of the items you see, or if you want something you don't see, get a hold of me.

-Dusty

Monday, May 16, 2011

Key clip

Key holders that snap to your belt so you can carry your keys outside of your pants and feel important.  They're constructed of latigo and brass hardware so they'll outlast whatever you're currently driving or riding.

 I made a bunch of these for the boys in Denver.  I've also sold a bunch here which is the blog of my friends in Denver (and a few other places).  These are also for sale here in Portland in a few stores along with some of my wallets.  If you'd like one or something similar contact me.

Tuesday, April 12, 2011

Front pocket/card wallet


I received a commission last week for a card wallet.  The fellow that ordered them wanted to wallet to be as thin as possible and to hold 3 cards per side.  After some paper modeling, a few emails and some quick/rough construction this is what I came up with.

 Once the dimensions of the pattern were worked out I cut out several wallets worth of leather in a few colors.  The pieces were then glued along the edges, that were later to be sewn, clamped and left over-night.


I then hand stitched the edges.  After sewing I trimmed, sanded and slicked all of the edges.  I only use waxed saddle thread as it's very durable.

Above lies a grip of wallets awaiting edge slicking.

An array of tools used on this project.

Wednesday, March 30, 2011

Iron


 Here are a few from a school project.  Ergonomics of the handle was the focus of the project.  We did some user testing and some focus group work.  A bit of refinement then went in the modeling process and made some looks like/feels like models.


I went through a number of users. Large/small.  Left/right handed.  They tested three of my models. The one with the most favorable overall feedback was the one chosen for the final model.


Of course several rounds of sketching went along with the user interviews and model making/testing sessions.

Tuesday, March 29, 2011

Postcards


 I'm often quite of enamored with the "old way" of doing things.  Usually this results in oily hands or an unmistakable smell of gasoline lingering about my person.  It also unfailingly leads me to learn things and have some small sense of personal satisfaction in what I've set out to do.  This project was no different (other than I didn't wind up smelling like gas) and is a result of my backwards way of thinking . That and of not getting anything in the mail but bills. 


 I remember the few postcards I got as a kid, how exciting it was to have mail from someone that just wanted to say hi.  So I made some cards from photos I have taken.  Sure I could just send a text or an email to a friend to say howdy but this makes it more fun.  I'm sure all of us get too much mail that's bills and not enough that's personal.


I just printed on cheap-o copy paper bonded the images to a heavier card stock and made a blender pen transfer sheet for my post card back that I whipped out in illustrator.  There you have it (quasi) instant post cards.  If you didn't get one of these and I know you email me your address.  If I don't know you and you want one email me your address and maybe I'll make up something fun and send you one...

Tuesday, March 22, 2011

March print of the month

 For this month's print I decided  wanted to print on silk.  More to the point I wanted to make something that could actually be used rather than just looked at.  To that end I decided I'd make bandannas, or scarves, or hankies...I also wanted the prints to be dyed into that fabric, not just on it.  I didn't want to be able to feel the print how you can on a  printed T-shirt.  Not hard to do, once you know all of the steps, just quite involved.
I won't go into all of the details, suffice to say that in learning about this process I gained new respect for some of the beautiful fabrics one can purchase.
The screen for this months image
 Long (boring) story short, after one whole day of printing and another of steaming and rinsing, I wound up with an edition of 18 images on silk(11) and rayon(7).

One blue silk hanky with an assortment of rayon hankies on top
 Using dyes is quite a bit different than just mixing some extender with some ink and just getting after it on some paper.  There are many different variables and many different schools of thought on how to address each one.
As a result of this, and of my inexperience, there is quite a bit of variation in the color saturation of all of my prints.   Then after all of the fun of the printing experience all of these still need trimmed and hemmed.  I can say I'd much rather run a TIG torch than a sewing machine but it is still fun.
But overall I am pleased with the results.  I also printed a number of these on paper since I had the screen done anyway.

Sunday, March 13, 2011

New collar

Here is a collar i just built.  All latigo and brass.I don't like the size of the D ring and the buckle, but that is what the guy ordered so...I'm pretty happy with how it came out otherwise.  I got to learn by doing (just like every time I do anything) and I got to work in a medium that I really enjoy.  I suggested latigo to the owner since it's a very resilient leather and it patinas quite well.  I also like how brass hardware and rivets and hand stitching just look right when all combined on latigo.

Here is a detail of the stitching on one of the strap keeper loops.  This stitch will never see the light of day again since it will be rotated and sandwiched between the body of the collar and the strap it will be keeping in place.  I just really enjoy the detail that goes into working items like this and I thought you might too.

Here is the ring for the leash, as you can see I've riveted it to the collar rather than just sewing it.  This way if the dog see's a particularly delicious squirrel on a walk he'll have little chance of tearing loose.

Top and under-side of the buckle.  As you can see the buckle is a little over sized for the width of the strap, but not horribly so.  I used rivets to fix the buckle strap to the collar.  I ran strap to the underside at the front to allow for more room when collaring the dog.  This lets the strap slip in without getting hung up on itself on the way through the buckle.  In hindsight I could have used a snap on the the front rather than the rivet to hold it down.  This would make swapping buckle out faster, but I doubt the owner will be doing any of that and I didn't want to run the risk of a snap popping loose if the dog were lunging on the leash.

Sunday, March 6, 2011

Pinapple

Here is a little scrap piece of leather that I worked on for Ava.  We were hanging out drawing the other night and Ava said she likes pineapples so I knocked this little guy out.
about 5 inches long
Now she wants me to build a wallet for her that has a pineapple motif.  I'll post that up when (if) I get around to making it.

Print of the month

My girl (Ava) and a few of her friends decided to form a club and to make a print, each, every month and share them with everyone else in the club.  She asked me if I wanted to do it and I said yes.  Ava wanted to do it so she could have an excuse to work on personal projects while she's in school.  I wanted to do it because when I was in school the "fine art" side of things was down played to non existence so this should be 1, a fun creative outlet and 2 a good learning experience since I've never done any sort of printing.

So I printed a run of twenty nineteen.
 
 White silk screen on vellum.

  So far Av and I are the only ones who've managed to get our prints finished and mailed out.  Hopefully everyone else gets their act together and contributes.